CAN I BUILD A WEB PAGE?
Yes you can! Today we will build our very own from scratch. It can be used as a start of a new hobby or a splash page for your business. We will start with a simple frame and customize along the way. Sounds easy enough, and it is, so let's start.
WHAT YOU WILL NEED:
- Computer (Get off your phone please...)
- Brain (That beautiful thing between your ears...)
- Picture (OK fine, you can use your phone for this...)
Websites are built in HTML, unabbreviated as Hyper Text Markup Language. Code is written words and symbols, called syntax, and is the language used to control and shape your website to do what you want. All programming languages have their own syntax and rules for different purposes. Today we will use HTML to build ours.
SETUP
All you need to build your website is the Notepad text editor that comes with Windows. For Mac you can use the textEdit program. Your computer is smart enought to know how to open the file using a web browser like Google Chrome, Internet Explorer or Safari when we save it using “.html” file extension instead of the default “.txt”. I will provide the code needed for your file for now follow these first steps for Windows or Mac:
Steps for Windows:
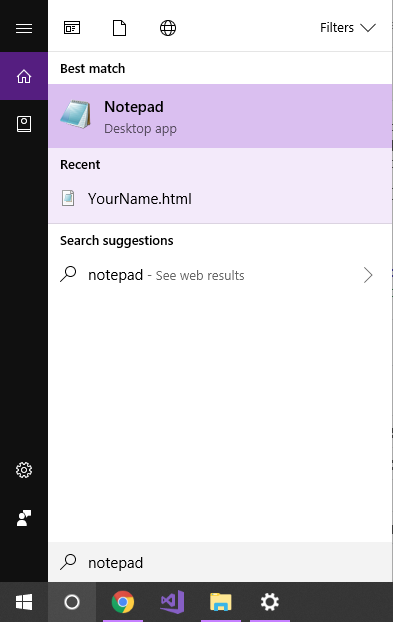
- Search for Notepad program and hit enter:
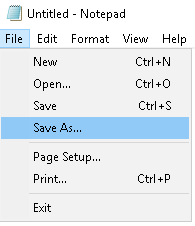
- Click File and Save As:
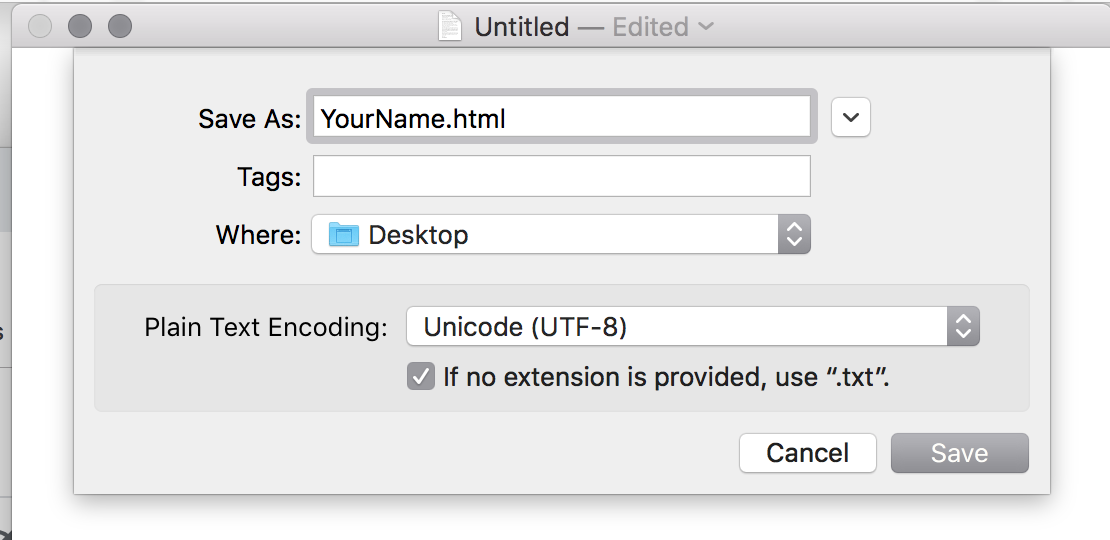
- Save file as “YourName.html” on your Desktop, you can put whatever you like for 'YourName', just be sure you have '.html' at the end:
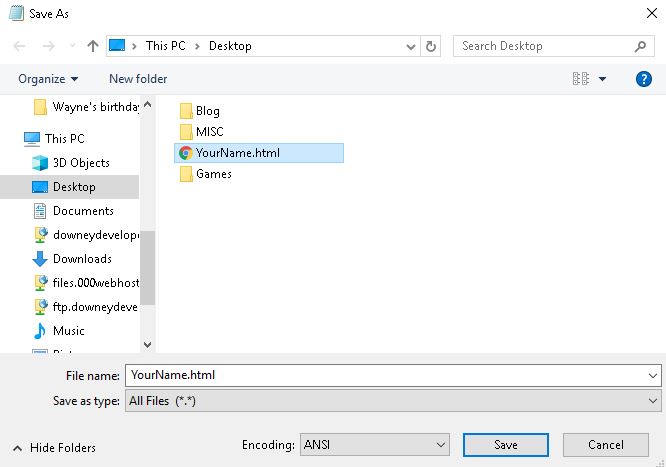
- Be sure your type is set to “All Files”. Then click save:

Steps for Mac:
- Search for the “TextEdit” program:

- Click “New Document” at the bottom of the opened window:

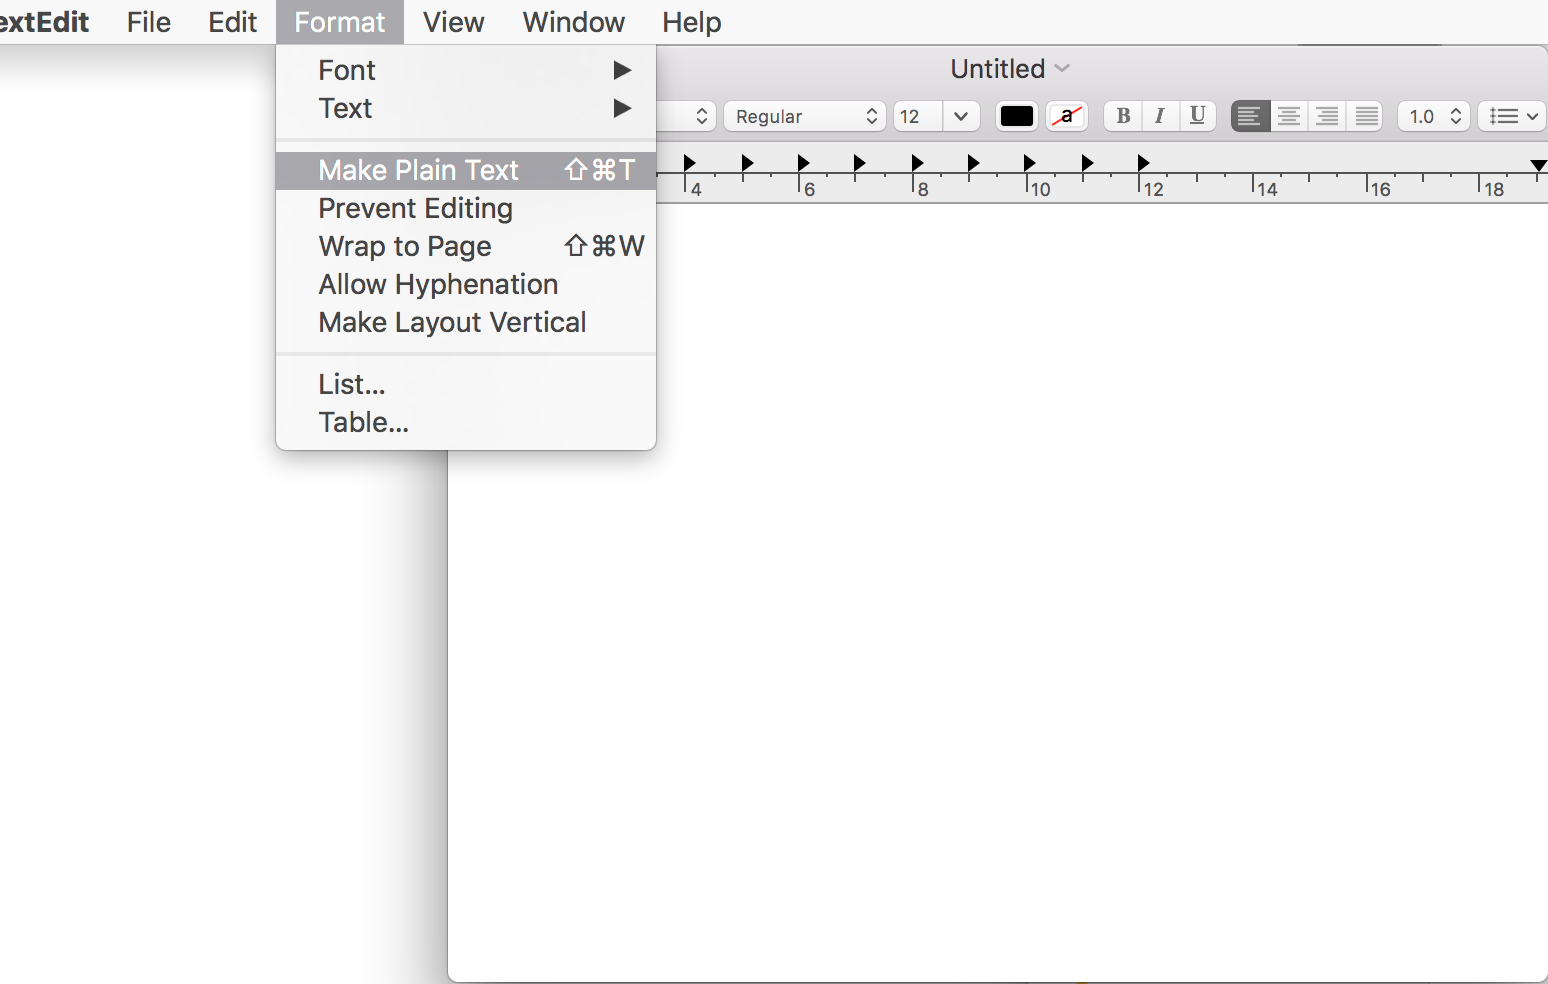
- For the new untitled document under format choose “Make Plain Text”:
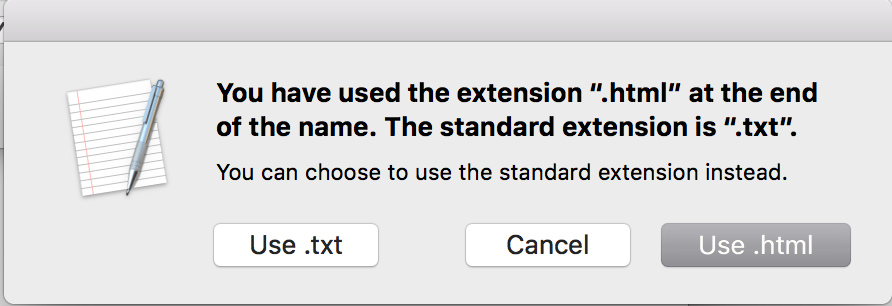
- Save this new document as “YourName.html” on your Desktop, you can put whatever you like for 'YourName', just be sure you have '.html' at the end:
- If prompted choose to “use .html”:
Steps for Both:
- Copy and paste the following HTML code in your file:
<!Doctype html>
<html lang="en">
<head>
<title> Your Name </title>
</head>
<body>
<h1> Your Name </h1>
<p> Welcome to my website!</p>
</body>
</html>
- Anywhere you see “Your Name” can be replaced with your actual name or whatever you want!
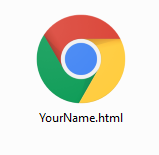
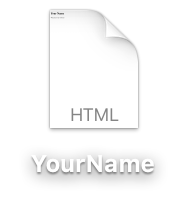
- Be sure to save your work whenever you make a change!- Go back to your desktop and double click your icon. It will be named whatever you named it from before:
- Congratulations! You just made your first website! It should look similar to below:
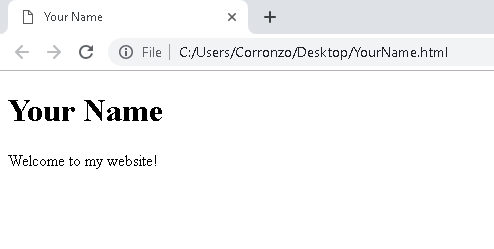
Wow, easy! If the page does not show up as expected then it could be because something was written incorrectly. This is called a syntax error. Double check for mistakes, save the file and refresh the web browser.
HOW AND WHY
We already know the html language describes how a web page will look. Our code is written using TAGS, a tag is a keyword enclosed in the opening and closing triangle brackets: “<???>”. Every start tag has an end tag denoted by a backslash: “</???>”. Let’s examine our code starting with our first two lines, this code tells the browser that the file is written in "html" and the english language "en":
<!Doctype html>
<html lang="en">
Now that the browser knows we are using "html" we can add info about the web page itself. This info is listed in between the “head” start and end tags. We used the starting "head" tag first:
<head>
Using the “title” start and end tags we can put our chosen name. This is what’s displayed on the tab of your web page:
<title> Your Name </title>

That's all we needed for the info about the page so we have to end the “head” tag denoted by the “/” backslash:
</head>
If the head tells us about a web page then the body will be what is actually on display. We use the “body” start tag for this:
<body>
The first line of code in the body is the “h1” header tag which describes a headline text visual. “h1” tags provide large text font and is bolded. This is in comparison to the paragraph tag "p" used after which smaller.
You can use a header tag to headline your page and then use "h2" and "h3" tags for smaller headers. In our case we just used “h1” to show our name but you can experiment as you like. Just be sure to save your file and refresh the browser to see changes.
<h1> Your Name </h1>
For writing our welcome message we used a regular text font and size achieved with “p”, the paragraph tag. Anytime you want to have simple text displayed just place it in between the start and end tags of "p":
<p>Welcome to my website!</p>
If you want to add more to your body please do so but be sure to save your work and refresh the browser.
That is all for our "body" so last added is its end tag:
</body>
This is also the end of what we want displayed on our page so we used the “html” end tag to inform the browser there is no more to display:
</html>
CUSTOMIZING
Our current code is a simple design so now let's try improving on it with CSS. CSS, or Cascading Style Sheets, is how we style the content on our html page.
CENTERING
Centering is a common styling addtion. The only two pieces of text we have are contained in the “h1” header and “p” paragraph tags. Using CSS we can simply make a reference to center those tags in the “head” section. Copy and paste the following highlighted code after the first “head” tag:
<head>

<style>
h1{
text-align: center;
}
p{
text-align: center;
}
</style>

<title>Your Name</title>
</head>
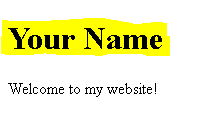
Saving the file and then refreshing the web page will give the following:

HOW AND WHY: CSS
When you refresh the browser or open the web page again you will see the text is now centered but how?
CSS code describes info about the page so that is why we put it inside “head” tags. We told it that all header “h1” and paragraph “p” text should be displayed centered on the page. For the browser to know we are using CSS we placed a starting “style” tag:
<style>
Next we want to style the header tag so we use the keyword tag “h1” including an opening curly bracket “{“:
h1{
We will close the curly bracket after including the CSS keyword for centering the text. The CSS keyword “text-align” describes the placement of text on a page. It is followed by a colon “:” to determine what type of placement we want. In this case we wanted the text to be centered. CSS requires you to end these descriptor lines of code with a semi-colon ";":
text-align: center;
That is the end of the changes to the “h1” styling so we closed the section with a closing curly bracket “}”:
}
We did similar for the paragraph “p” section:
p{
text-align: center;
}
Finally we added the ending “style” tag to let the web browser know the end of the CSS code.
</style>
As you may have guessed there are many other keywords for styling that you can discover on your own. We will focus on the basics.
ADD A PICTURE
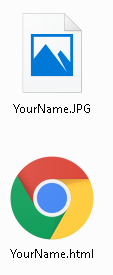
In most cases you will want some sort of media on your page and we can easily do that in HTML. Before we start coding be sure you have picture saved on your desktop, this is the same location where your html file is so it will be able to access it. The name of your image file can be anything, in my case I used “YourName.JPG”. Note image file may not end in ".JPG":
The image code is to be added in the body section after the header “h1” tag for our name. The code to be copy and pasted is highlighted below followed by an explanation. Do not forget to change "YourName.JPG" to the exact name of your file, extension included:
<h1>Your Name</h1>

<img src="YourName.JPG"
alt="YourName"
height="35%" width="35%">

<p>Welcome to my website!</p>
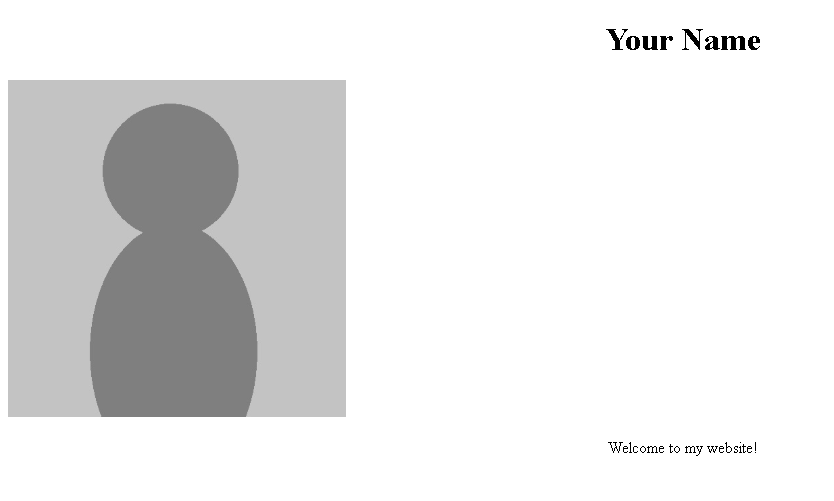
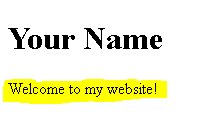
Saving your HTML file and refreshing browser should show similar to above depending on your picture size. This piece of HTML code uses the “img” tag followed by attributes "alt", "height" and "width" which provide control over the way the image is displayed. Most importantly is the "src" attribute which tells us the location of the image. Since your HTML file and image file are in the same location, your desktop, the picture will load correctly:
<img src="YourName.JPG"
alt="YourName"
height="35%" width="35%">
In case the file goes missing we use the “alt=” keyword to let the web page know to display those words instead:
<img src="YourName.JPG"
alt="YourName"
height="35%" width="35%">
The “height” and “width” attributes are used to control the size of your image. In most case you will have a rectangular image. Depending on the size of your image you can adjust the values we used in the example by increasing or decreasing them to your liking:
<img src="YourName.JPG"
alt="YourName"
height="35%" width="35%">
STYLE YOUR PICTURE
Our picture added but it is off to the side so let's center and round it out. For styling we know the CSS code must go in the "style" section of the "head". To adjust the “img” tag we will copy and paste the code highlighted below after the starting "style" tag:
<style>

img {
display: block;
margin-left: auto;
margin-right: auto;
border-radius: 50%;
}

h1{
You can now save and refresh to see the changes.
HOW AND WHY: CSS Continued
Let’s break down the image CSS code we added to the “style” section. We denoted the start of the image segment with “img {”:
<style>

img {
display: block;
margin-left: auto;
margin-right: auto;
border-radius: 50%;
}

h1{
The next line code used the "display" attribute to say that all images will display in a “block” style. This means it will show up on a new line:
<style>

img {
display: block;
margin-left: auto;
margin-right: auto;
border-radius: 50%;
}

h1{
The two lines of code after using attributes “margin-left:” and “margin-right:” is how we center an image. In this case we set them both to “auto” so the left and right sides of the screens will automatically adjust to the same amounts making the image center:
<style>

img {
display: block;
margin-left: auto;
margin-right: auto;
border-radius: 50%;
}

h1{
To make our picture rounded we used the “border-radius:” attribute which crops our image into a circle based on the percentage we set it at. In our example we used “50%” but you can adjust as needed:
<style>

img {
display: block;
margin-left: auto;
margin-right: auto;
border-radius: 50%;
}

h1{
Lastly we closed the image styling section with a closing curly bracket:
<style>

img {
display: block;
margin-left: auto;
margin-right: auto;
border-radius: 50%;
}

h1{
CONCLUSION
Our simple example is a sample of the possibilities for creating a web page. From here you can seek out more on HTML and CSS to further customize to suit your needs.
Right now this page is only accessible on your computer but what if we wanted to put it online for others to see? To do that you need a hosting site to put the page on. Contact us to host at Downey Developers' site for a url similar to the following:
www.DowneyDevelopers.com/Sample
If you have further questions please reach out anywhere, anytime!